Optimizing Your Meta Quest 3 for Sim Racing Excellence
Author
GeraldFerreira
Date Published
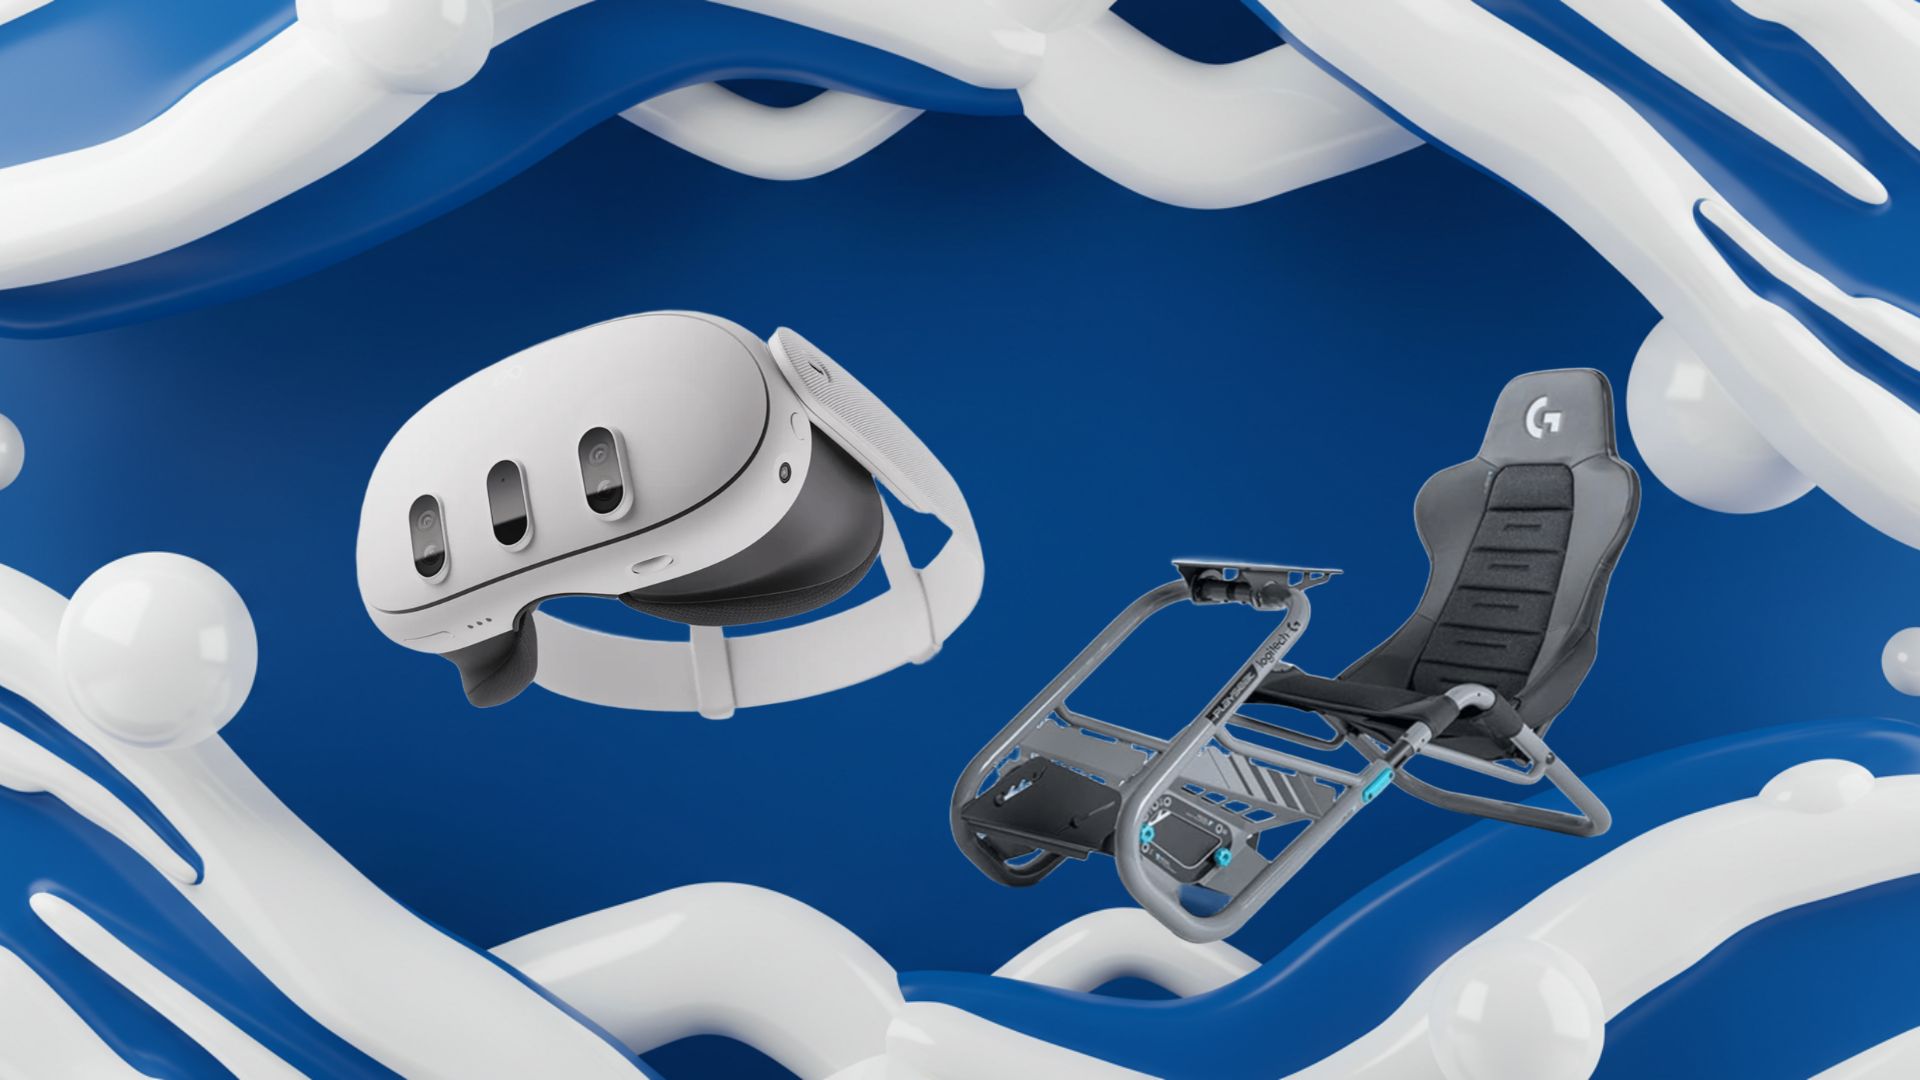
A comprehensive guide to achieving peak performance and immersion Sim racing has matured into a discipline that demands not only skill behind the wheel but also a meticulously calibrated virtual environment. The Meta Quest 3 stands as a compelling choice for enthusiasts seeking an untethered yet powerful VR experience. With its advanced passthrough, high-resolution LCD panels, and robust tracking capabilities, Quest 3 can transform your racing sim into an immersive cockpit that responds seamlessly to every steering input, pedal modulation, and head movement. To harness this potential, one must consider a holistic setup encompassing hardware compatibility, software configuration, performance optimization, input calibration, and ergonomics. This guide outlines a step-by-step approach to preparing your PC and rig, installing essential applications, fineÔÇætuning display settings, calibrating control peripherals, and enhancing comfort, so you can focus entirely on shaving milliseconds off your lap time rather than troubleshooting connectivity or frame rate issues. We will explore options such as USB 3.2 Gen 1 connectivity for Link cable, recommended GPU tiers for maintaining 90+ FPS, and ergonomic mounting methods that secure the headset without obstructing your steering rigÔÇÖs range of motion. Additionally, we delve into the comparative advantages of using Virtual Desktop networks versus a wired Oculus Link, balancing pixel density and latency tradeÔÇæoffs. This discourse integrates empirical performance metrics, practical calibration routines, and expert ergonomic guidelines reminiscent of labÔÇætested protocols to deliver an authoritative yet accessible roadmap for both seasoned sim racers and newcomers transitioning from flatÔÇæscreen setups. Armed with these insights, you can confidently optimize your Quest 3 deployment to achieve flawless visual fidelity, instantaneous control feedback, and sustained comfort during extended racing sessions. Whether you pilot openÔÇæwheel machines, GT cars, or classic touring cars, the procedural approach outlined here ensures consistency across titles like Assetto Corsa Competizione, iRacing, and Project CARS, reaffirming the Quest 3 as a viable and versatile tool in advanced racing simulations. Preparing Your Hardware Environment VR-Ready PC Specifications At the core of any highÔÇæfidelity sim racing experience lies the computing power to render complex 3D environments at high frame rates. A PC configured for Quest 3 should feature a modern multiÔÇæcore CPUÔÇöideally a 6ÔÇæ or 8ÔÇæcore processor from IntelÔÇÖs i5/i7 series or AMDÔÇÖs Ryzen 5/7 lineupÔÇöwith clock speeds exceeding 3.5 GHz to handle physics calculations and background tasks. Coupled with at least 16 GB of DDR4 RAM clocked at 3000 MHz or higher, the memory subsystem will prevent bottlenecks during telemetry and game state updates. For graphics, an NVIDIA RTX 3060 or AMD Radeon RX 6700 XT (or better) is recommended to maintain consistent 90ÔÇô120 FPS at the headsetÔÇÖs native resolution. Ensure your motherboard includes a USB 3.2 Gen 1 TypeÔÇæC or TypeÔÇæA port for wired Link, and connect your Quest 3 using a certified highÔÇæbandwidth cable or the official Oculus Link cable to prevent dropped frames. Quest 3 Mounting Solutions Securing the Quest 3 to a stable mounting solution is critical for sim racing rigs where rapid head movements and force feedback are part of the realism. While the Quest 3 ships with an adjustable halo strap, upgrading to a custom mount or using an aftermarket head strap harness can improve distribution of weight across your skull and minimize wobble. Many enthusiasts leverage a universal VR stand or clampÔÇæmounted bracket that attaches directly to their sim rigÔÇÖs roll cage or wheel stand. This approach ensures that the headset remains fixed relative to your cockpit, reducing motion artifacts and preserving immersion during aggressive cornering maneuvers. For DIY fabrications, a simple LÔÇæbracket fashioned from aluminum extrusion and padded with foam inserts can offer a lowÔÇæcost yet effective alternative. Affix the bracket at eye level, verifying that it doesnÔÇÖt interfere with wheel rotation or your peripheral view of virtual dash instruments. If you prefer a marketÔÇæready option, consider modular mounts that integrate with racing hubs like the Playseat, Next Level Racing, or Trak Racer systems. These mounts often include quickÔÇærelease mechanisms so you can swiftly detach the headset for nonÔÇæracing VR activities without reconfiguring your entire rig. Sim Racing Rig Integration Integrating the Quest 3 into your existing sim racing rig requires thoughtful alignment of physical and virtual coordinate spaces. Begin by positioning the headset originÔÇödefined in the Oculus PC appÔÇödirectly above the center of your steering wheel hub, ensuring that forward defines the same axis in both worlds. Measure the distance from your eyes to the wheel hub and calibrate the inÔÇægame cockpit camera lens height accordingly. It is advisable to remove or reposition any realÔÇæworld obstacles such as monitors or cables that could collide with the headset during quick head turns. Additionally, consider modular mounts for your shifter, pedals, and handbrake that accommodate the added clearance required by the Quest 3ÔÇÖs dimensions while maintaining ergonomic reach to analog components.

Preparing Your Hardware Environment Installing and Configuring Software Oculus PC App Installation To leverage the full capabilities of your Quest 3 for PCÔÇæbased sim racing, install the latest Oculus PC application on Windows 10 or 11. Download the installer from the official Oculus website, run the setup, and allow it to fetch firmware updates and drivers for your headset. After logging in with your Meta account credentials, navigate to the Devices tab and add your Quest 3 by following onÔÇæscreen prompts. Confirm that USB drivers install successfully by verifying ÔÇÿQuest 3ÔÇÖ appears under Devices in Device Manager with no warning icons. Finally, enable ÔÇÿAllow unknown sourcesÔÇÖ and ÔÇÿUse USB for Oculus LinkÔÇÖ in the headset settings to permit nonÔÇæstore apps like SteamVR to access the device. SteamVR and Sim Racing Titles Integration While the Oculus PC app provides native support for Oculus Store simulations, the broader sim racing ecosystem often resides within SteamVR. To integrate Quest 3 with SteamVR, launch the Oculus PC application, connect your headset via Oculus Link, and enable SteamVR within the Oculus menu. Once SteamVR launches, ensure your controller inputs and tracking are recognized by inspecting the SteamVR status window. At this juncture, you can open your sim racing titleÔÇösuch as Assetto Corsa, rFactor 2, or Project CARS 3ÔÇödirectly through Steam, benefiting from SteamÔÇÖs overlay features and workshop mods. For a seamless experience, configure each simÔÇÖs graphics and input settings within SteamVR. Access the ÔÇÿManage VR SettingsÔÇÖ section to set your preferred supersampling, mirror options, and motion reprojection thresholds. In your simÔÇÖs control options, map your steering wheel, pedals, and handbrake under VRÔÇæexclusive profiles, preserving force feedback parameters. If your game supports VRÔÇæspecific HUD modes, activate overlays that render speedometers and telemetry in fixed positions relative to your virtual cockpit. These calibrations ensure consistent performance and control fidelity, bridging the gap between traditional monitorÔÇæbased setups and immersive VR. Virtual Desktop vs. Wired Link Opting between Virtual DesktopÔÇÖs wireless streaming and a wired Oculus Link directly influences latency and image quality. Virtual Desktop, paired with a highÔÇæspeed 5 GHz WiÔÇæFi 6 router, grants freedom of movement untethered by cables, albeit at the cost of occasional compression artifacts and marginally higher latency. Ensure that your PC is connected via Ethernet and your router is tuned for minimal interference to achieve stable streams. Conversely, using a USBÔÇæC or USB 3.2 cable for Oculus Link delivers an uncompressed video feed to the Quest 3, guaranteeing the lowest possible latency and maximum visual fidelity. While the wired approach restricts your range of motion, it is generally preferred for competitive sim racing, where every millisecond counts.

Installing And Configuring Software Optimizing Display and Performance Settings Resolution and Refresh Rate Adjustments Quest 3ÔÇÖs highÔÇæresolution LCD panels support multiple refresh ratesÔÇöcommonly 72 Hz, 90 Hz, and 120 HzÔÇöalongside customizable rendering resolutions. In the Oculus PC appÔÇÖs Graphics settings, select 90 or 120 Hz as your refresh rate to match your simÔÇÖs performance envelope. Next, adjust the Render Resolution slider to calibrate pixel density; a higher value enhances sharpness but demands more GPU throughput. It is advisable to conduct benchmark runs at various settings to identify the equilibrium between visual clarity and frame rate stability. For titles that support dynamic resolution scaling, enable this feature to allow the game engine to downscale the render resolution in motionÔÇæheavy scenes, preserving consistent refresh cycles. Graphics Quality Balancing Within each sim racing titleÔÇÖs graphics menu, balance parameters such as texture quality, shadow resolution, antiÔÇæaliasing, and postÔÇæprocessing effects. Setting these to ÔÇÿMediumÔÇÖ or ÔÇÿHighÔÇÖ often yields optimal visuals without overwhelming GPU resources. Utilize the Oculus Debug ToolÔÇöwhich ships with the Oculus PC appÔÇöto override inÔÇægame supersampling settings or apply fixed pixel density multipliers. Gradual adjustments to ambient occlusion and screenÔÇæspace reflections can reduce CPU overhead associated with scene complexity, while maintaining a believable environment. Periodically monitor GPU utilization statistics and frametime graphs using tools like MSI Afterburner or the builtÔÇæin SteamVR performance overlay to ensure that neither compute nor memory bandwidth becomes a limiting factor. Frame Rate Stabilization Techniques Consistent frame delivery is crucial to prevent judder and motion sickness during rapid head turns. Enable Adaptive Sync or FreeSync on your monitor and graphics card to allow the display to synchronize with GPU output, reducing stutters. In the Oculus Debug Tool, toggle ÔÇÿMotion SmoothingÔÇÖ to permit asynchronous reprojection when the render pipeline dips below your target refresh rate. For wired setups, disable Windows Game Mode and foregroundÔÇæexclusive optimizations to allocate maximum resources to your sim. Using an overclocked GPU profileÔÇöwith a mildly increased core clock and optimized fan curveÔÇöcan also smooth out performance spikes. Finally, close background applications that may trigger context switches, such as web browsers, streaming apps, or system utilities.

Optimizing Display And Performance Settings Calibration and Fine-Tuning Controls Steering Wheel and Pedal Calibration Accurate input calibration begins with manufacturerÔÇæprovided drivers and configuration utilities. After installing the wheelÔÇÖs Windows softwareÔÇösuch as Logitech G Hub, Thrustmaster Control Panel, or Fanatec Command CenterÔÇöuse the calibration wizard to define pedal travel endpoints, steering range, and deadzones. ZeroÔÇæcentre the device by ensuring the wheel and pedals return to their neutral positions with minimal drift. Save your calibration profiles at a global level and assign gameÔÇæspecific overlays for titles that deviate from standard control schemas. Properly calibrated hardware is the foundation of reliable force feedback and proportional pedal response. Within each simÔÇÖs options menu, import your hardware calibration profile and verify axes alignment by observing the inÔÇægame telemetry display. Adjust steering lock and linearity settings to suit your preferenceÔÇölinear for precise control, nonÔÇælinear for more nuanced pedal modulation. Brake force curves can be softened or stiffened to mimic realÔÇæworld brake pedal stiffness. If available, enable autoÔÇæcentering for the wheel during rapid vehicle resets or when switching between cars with varying steering ratios. Regular recalibrationÔÇöafter firmware updates or hardware maintenanceÔÇöprevents anomalies that can manifest as control hysteresis or erratic input readings. VR Input Mapping in Game Mapping VR controller inputs to simÔÇæspecific functions enhances operational efficiency on the fly. In titles like Assetto Corsa Competizione or iRacing, access the input binding screen and assign Oculus Touch or Index controller buttons to critical inÔÇæcockpit actions such as pit limiter, radio comms, or helmet adjustment. Leverage builtÔÇæin gesture recognitionÔÇöif supportedÔÇöto toggle HUD elements or switch camera views without removing your hands from the wheel. Consult the gameÔÇÖs VR mode documentation to account for variations in axis mapping conventions between traditional controllers and VR input devices. Proper mapping reduces reliance on keyboard shortcuts and improves focus during competitive sessions. Haptic Feedback Configuration Beyond force feedback from steering wheels, the Quest 3ÔÇÖs builtÔÇæin haptics can contribute subtle tactile cues during sim racing. In the Oculus app settings, increase the Audio Haptics slider to amplify lowÔÇæfrequency vibrations synchronized with engine idle and tire slip. If your sim supports perÔÇæchannel rumble, assign haptic intensity maps to virtual surfaces such as rumble strips or road imperfections. Position a compatible haptic vest or seat transducer to capture these signals, bridging the gap between digital events and physical sensations. Always monitor haptic feedback levels to prevent overstimulation that could lead to distraction or discomfort during lengthy endurance races.

Calibration And Fine Tuning Controls Enhancing Immersion and Comfort Headset Comfort Adjustments Long stints behind the wheel can be taxing on the neck and facial pressure points if your headset fit is suboptimal. Begin by adjusting the top and side straps to balance the Quest 3ÔÇÖs weight evenly across your head, avoiding pressure hotspots around the brow ridge. Consider aftermarket facial interface kitsÔÇösuch as foam replacements or silicone masksÔÇöthat wick moisture and reduce friction. Adding a counterweight at the rear strap can offset the headsetÔÇÖs frontÔÇæheavy tendency, preventing forward tilt during intense steering inputs. Take regular breaks every 60ÔÇô90 minutes to relieve ocular strain and recalibrate the fit before returning to the virtual cockpit. Audio Setup for Sim Racing Audio fidelity plays a pivotal role in sim racing immersion, providing cues like tire squeal and engine RPM rollÔÇæoffs. While the Quest 3ÔÇÖs integrated spatial audio drivers are serviceable, dedicated overÔÇæear headphones often deliver superior sound staging and bass response. For wired connections, use a USB DAC or 3.5 mm audio jack with a quality splitter to maintain low latency and consistent volume levels. If you prefer wireless freedom, opt for lowÔÇælatency codecs such as aptX LL on compatible headsets. In the simÔÇÖs audio settings, fineÔÇætune environmental volumes, engine sound levels, and ambient cue sliders to balance immersion with the need to hear essential tire and mechanical feedback. Motion and Ergonomics Best Practices Adopting proper posture and motion awareness can enhance performance and reduce fatigue during marathon racing sessions. Position your chair or racing seat so that your hips are level with or slightly above your knees, promoting spinal alignment. Angle your foot pedals at a comfortable tiltÔÇötypically between 10 and 15 degreesÔÇöto enable natural ankle dorsiflexion. Keep your hands at the traditional 9 and 3 oÔÇÖclock positions on the wheel, with light arm bend to absorb roadÔÇæinduced forces via your shoulders rather than neck. Incorporate desk stretches and wrist rotations during scheduled breaks to maintain circulation and prevent repetitive strain injuries over prolonged periods.